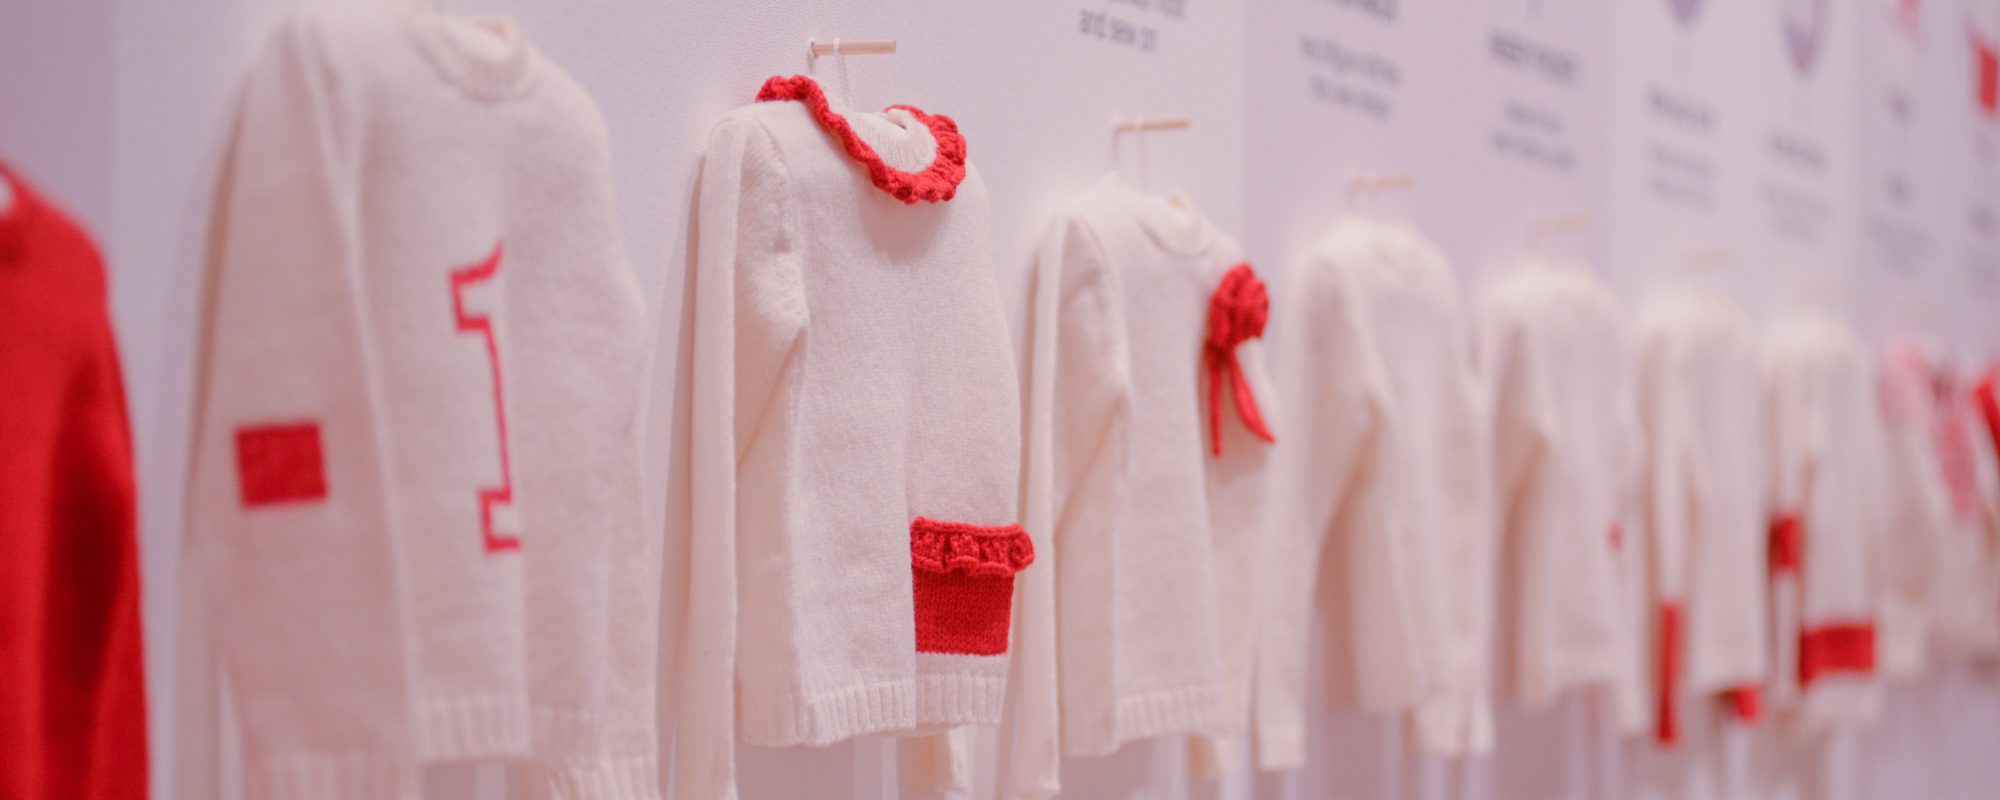
Here’s another treatment on my reknitting sampler garment. I’ve previously posted about the stitch-hacked initials, frills and afterthought pocket; in this post I describe how I replaced the cuff on the jumper.
To replace the cuff on this jumper, I needed to change gauge: to change from the tiny original stitches to a handknit gauge. In fact, the gauge of the original was so fine – 60st/10cm – that it was beyond the scope of the guidance on the replace cuff treatment page. Therefore, I needed to work the decreases to get to my target gauge – 30st/10cm – in two steps.
I knitted the first step at 3:2 ratio (decreasing 3 stitches to 2 stitches across the row), and the second step at 4:3 ratio (decreasing 4 stitches to 3 stitches across the row). I used a garter stitch-based transition for the first step, and a slip stitch-based pattern that I called ‘TV set’ (a version of ‘rabbit ears’, shown on the replace cuff treatment page) for the second.
Here’s the TV set stitch pattern, for the 4:3 ratio:
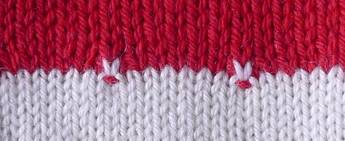
Pick up a multiple of 8 sts + 1 st
1st row (WS): *p4, sl1 pwise, p3; rep from * to last st, p1.
2nd row: *k3; sl2 tog, k1, psso; k2; rep from * to last st, k1.
Continue in stocking stitch.
To start to visualise what my cuff might look like, I photocopied the sample of the TV set pattern to the scale it would knit up and placed these copies alongside some buttons, to suggest some bobbles, and my chosen yarns:

Then, I started knitting, experimenting with bobbles, stripes and slipped stitches, and testing my tension. I’d had the idea of using some of the unravelled cuff yarn in a stripe, so I used a yarn of a similar colour in my samples. I learnt as I went along, and used more photocopies to help me:

I tried on the jumper and basted a guide line for where I wanted the cuff to start. When I’d finalised my design, I opened the seam and opened a row across the whole panel to remove the old cuff:

I measured the length and width of the old cuff. Then, I picked up the open stitches using a 0.7mm needle. I counted the stitches, and did some figuring out: how to place my design centrally and symmetrically, and how often to decrease to create the correct cuff shape.
I unravelled the old cuff a little, ironed the yarn straight, and placed four strands together. I liked the re-used yarn so much, that I revised my design while I was knitting, to include a extra stripe.
I worked the rib without sampling – I figured that if I didn’t like it, I could easily rip it back and re-knit. Happily, it turned out just right. I worked a stretchy cast off and finally stitched the seam using mattress stitch, and tidied away the ends:

Want to have a go? Check out the replace cuff instructions pages for detailed step-by-step guidance, or take a look at other projects in the gallery for inspiration.
